Manage extensions#
You install an extension once into your account's shared store, then turn it on for each profile that needs it. This page covers installing extensions, turning them on for a profile, and reinstalling them when you use 9Login on another computer.
Open the list#
Click Extensions in the sidebar. In the profile form, the gear button next to the Extensions item
also opens this list.
Extensions are a paid plan feature. On the Free plan, the Extensions item shows a lock, you cannot
install new extensions, and profiles open without any extension (you can still delete existing
extensions). Sub-users need the Manage extensions permission to install or delete extensions, see
Teamwork.
Install an extension#
Every way of installing goes through the
Search the Web Store, or paste an id, URL, .crx / .zip path or folder box at the top of the screen:
- Search the Chrome Web Store: type the extension name, click
Search, then clickInstallon the result you want.Load moreshows more results, andBack to my listreturns to your list. - Web Store link or id: paste the link to the extension's page (or its 32-character id), then
click
Install. .crxor.zipfile: clickFileand pick the package on your computer.- Unpacked folder: click
Folderand pick the folder that holds the extension. 9Login copies the folder, so you can move or delete the original afterwards.
A newly installed extension appears in the table with its Name, Version, Source and Used
(number of profiles using it). The Source column shows where the extension came from, and that
decides how you reinstall it on another computer:
Source |
Meaning |
|---|---|
Web Store |
Downloaded from the Chrome Web Store. Another computer can reinstall it with one click. |
File |
Installed from a .crx or .zip file, or from an unpacked folder that 9Login copied. Another computer needs that same package or folder to reinstall it. |
Folder |
Points to a folder on one computer without copying it. Only entries added by older versions of 9Login have this source; it works only on the computer that has that exact folder. |
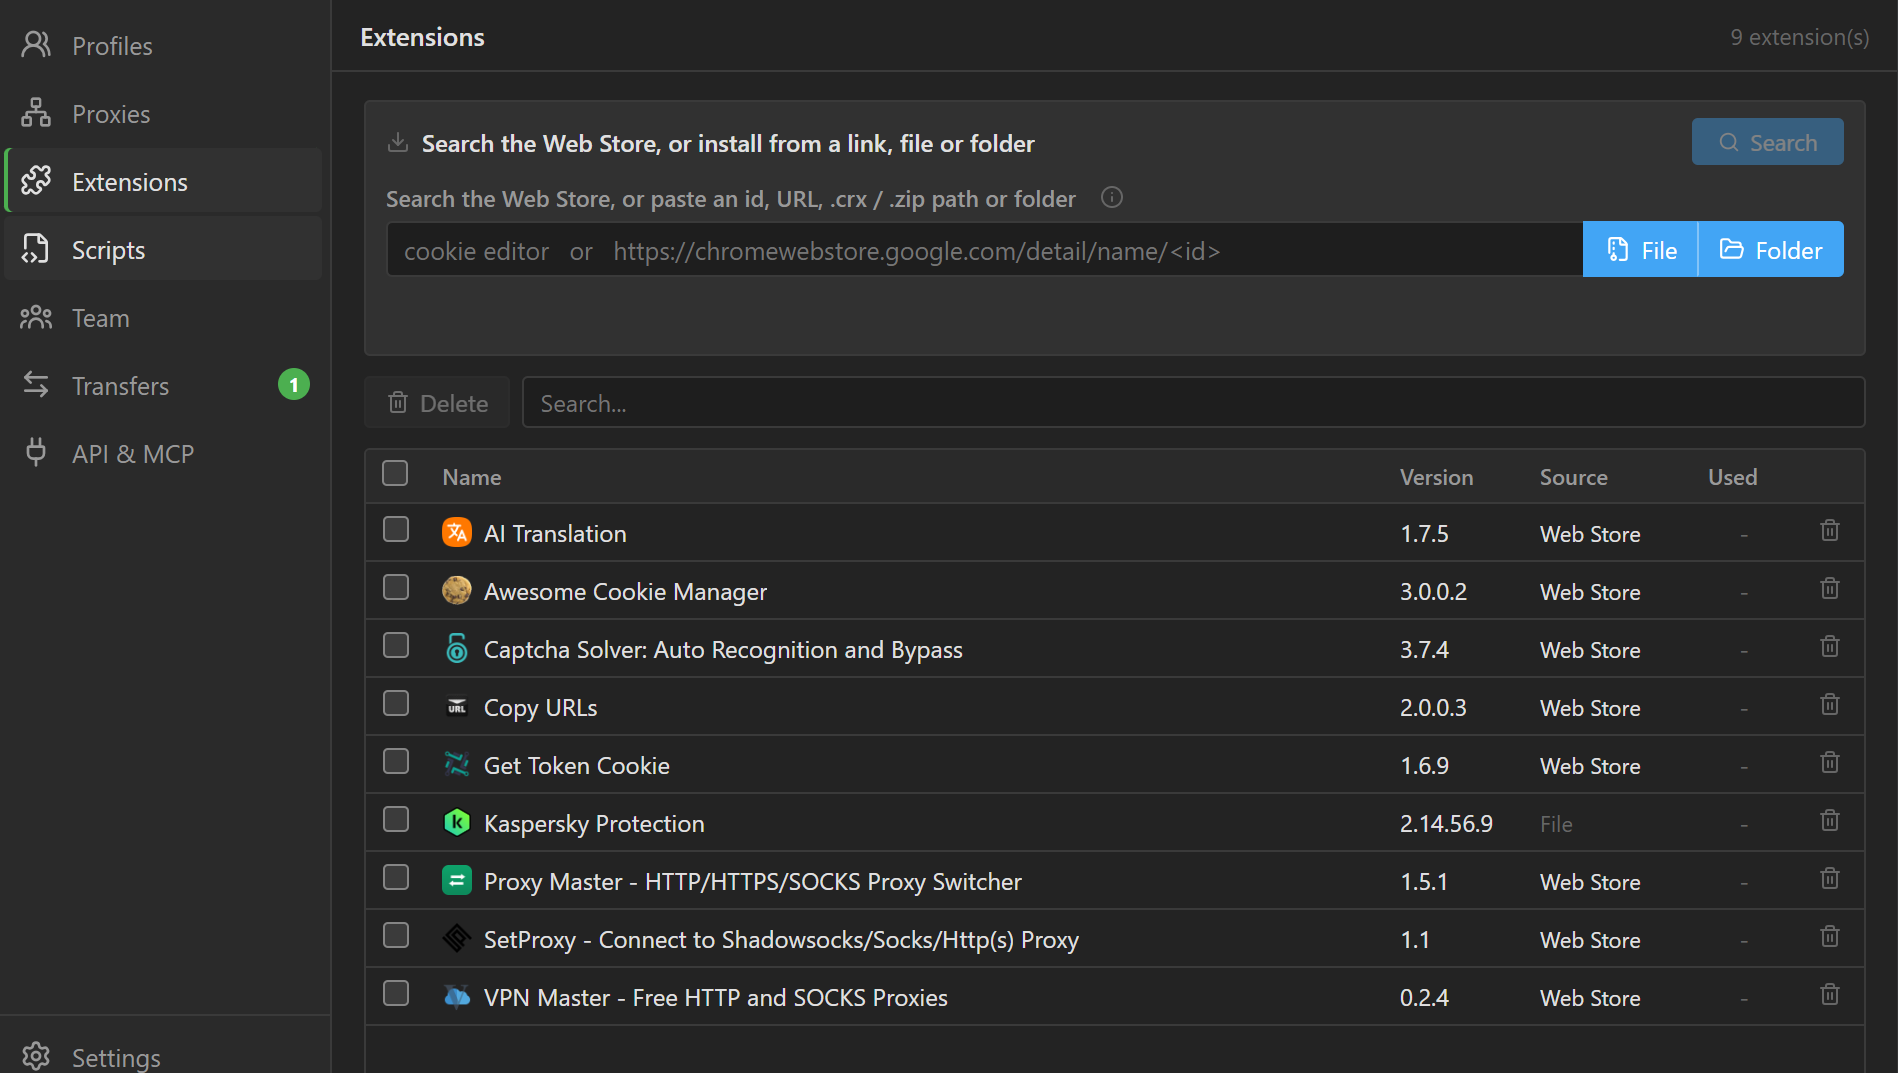
To delete an extension, check it and click Delete, or click the trash can at the end of its row. An
extension that profiles are using is also removed from those profiles; the app asks you to confirm
before deleting.
Turn on an extension for a profile#
In the profile form, in the Advanced group, the Extensions item lists every extension in your
list. Check the extensions you need, then save the profile. A checked extension runs every time the
profile opens; uncheck it and it is gone the next time the profile opens. See also
Profile settings.
You can change this only while the profile is stopped.
Use on another computer#
The extension list lives on your account, but extension files are installed on each computer. When
you sign in to 9Login on a new computer, extensions that are not yet on that computer show a cloud
icon with the note In your account, not installed on this computer.
- Extensions from the
Web Store: click the cloud icon on that row (Install here), or clickInstall all missingto install them all at once. - Extensions from a
FileorFolder: the app cannot download these. Install that same package or folder again on this computer.
A profile opened on a computer that is missing an extension runs without that extension.
Extension data#
Data that an extension stores in a profile (for example a crypto wallet, or the extension's own
settings) is part of the profile's cloud data, as long as the
Local storage, extension data and open tabs box in Settings is on (it is on by default). On
another computer, reinstall the same extension, download the profile's cloud data, then open the
profile: the extension has its old data back. See Cloud data.